DIY Happy Stones

Happy Stones are colourfully decorated stones you can hide in nature for others to find. When you find a Happy Stone, you could hide it again for someone else to find, but there are people who take them home and collect them as well.

Go to step 1

Create your own

In this step-by-step plan, we will show you three ways to turn ordinary stones into Happy Stones: with paint, Crackle Medium and Decoupage. 
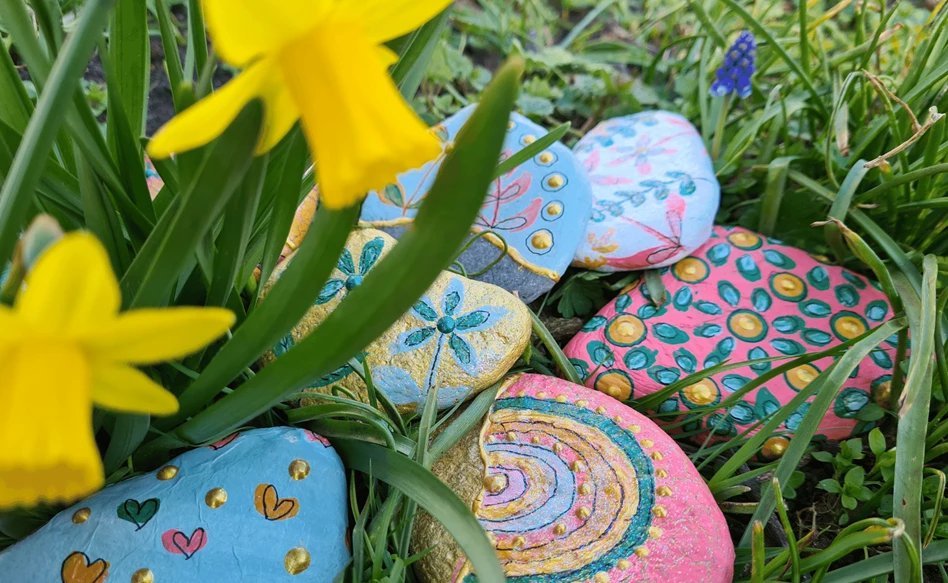
We used Talens Art Creation Indoor & Outdoor paint for a long-lasting colour and then decorated the stones with various other materials, including Effect Liners and if you’re up for it: glitter! Have fun creating your own Happy Stones and organising a little stone hunt!

Tips: pick stones of different shapes and sizes for variation. Don't forget to wash the stones and let them dry before decorating them, this will help the paint adhere to the stone better.

What you need

  • Talens Art Creation Indoor & Outdoor
  • Talens Art Creation Effect Liner
  • Talens Art Creation Crackle Medium
  • Talens Art Creation Decoupage
  • Talens Art Creation Lacquer
  • Amsterdam Glitter
  • Sakura IDenti-Pen in black
  • Stones
  • Sponge Sticks
  • Paintbrush
  • Rice/tissue paper

Start with a clean surface.

Step 1 - Paint

Use a sponge stick to evenly paint the stones in any colour of the Indoor & Outdoor paint you like. Let it dry for 30 minutes.

Add a design.

Step 2 - Paint

Take a small detail brush to add decorations to your stone using the same Indoor & Outdoor paint in different colours.

Time for some 3D details.

Step 3 - Paint

Add a 3D effect using the Effect Liners! This way, you can create dots and lines that really stand out.

Add your linework.

Step 4 - Paint

To add some contrast and detail to the drawings you made using paint, use the IDenti-Pen in black.

Add some protection.

Step 5 - Paint

If you want to give your stone some sparkle, add a layer of clear lacquer and sprinkle some glitter on top!

That’s it for the standard Happy Stones. Read on if you want to try out different methods!

Try something different!

Step 1 - Crackles

If you’re looking for an interesting crackle effect, add a layer of the Crackle Medium before adding your first coat of colour. Once the layer is dry, add a coat of Indoor & Outdoor using a sponge stick and let this dry for 30 minutes. To top it off, add another layer of the Crackle Medium and watch the magic happen!

Tip: the thicker the layer of Crackle Medium, the bigger the cracks will be.  

Now add some colour.

Step 2 - Crackles

Once the last layer of the Crackle Medium has dried completely, quickly add another layer of your Indoor & Outdoor colour and let dry. Be quick to apply the paint because the crackle effect sets in immediately.

Finish it off with your designs.

Step 3 - Crackles

Now you can add your decorations using the Effect Liners, glitters and IDenti-Pen, just like with the original example.

Easily add intricate designs using decoupage!

Step 1 - Decoupage

First, paint your stones in any colour of the Indoor & Outdoor paint using a sponge stick for even coverage.

Add a design.

Step 2 - Decoupage

Decorate your tissue or rice paper using a small detail brush and the same paint. Make sure to let it dry completely before moving on to the next step. You can also pick a fun patterned napkin for this method.

Decorate your paper further using the IDenti-Pen to add lines, letters and other details.

Apply the paper to your stones.

Step 3 - Decoupage

Apply Decoupage to your coloured stone and carefully place your tissue or rice paper on top. Make sure the paper covers the stone well and add another layer of Decoupage and let dry for 30 minutes.

Add your final details.

Step 4 - Decoupage

Now you can add extra details and effects using the Effect Liner and glitter if you like, using the same methods as in the original example.

Add a message or # on the back!

Final step

Write a # or Facebook group on the back of the stone if you want people to share photos of their found stones! Now you’re ready to hide your stones in your backyard, the neighbourhood or in the forest. Have fun hunting stones!

Fancy more inspiring step-by-step plans?

Check out the blogs using the same technique!